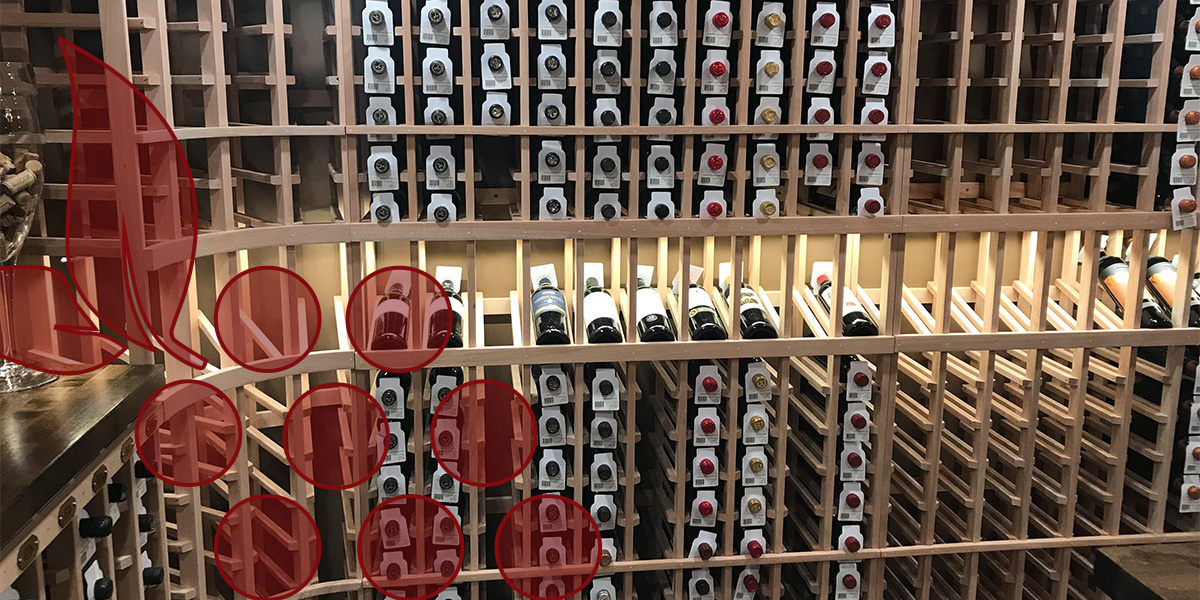
What You Need to Build a DIY Cellar
![]()
Having suitable tools and equipment is essential when building a wine cellar. Supplies you'll need for
the job include:
- A room with an appropriate temperature
- Metal or wood studs
- Vapor barrier & insulation for walls and ceilings
- Sealed floors
- Closed-cell spray foam
- Soffits/ raised panel ceiling
- Insulation contact (IC) can lights
- Conditioning/ducted air handler, ductless split or a cooling unit
- Ducting for distributing airflow
- Drain line
- Humidifier
- Electric cables
- 110-voltage electrical outlet
- IC can lights or flush mount lights
- Water resistant drywall
- Screws and nails
- Hammer and drill
- Fire-rated penetration sealant
- Primer
- Water base exterior grade paint
- Greenboard or tongue and groove for the walls and ceilings
- Flooring material that can withstand high humidity, not carpet
- Exterior grade doors
How Do You Build a Custom Wine Cellar
Here's how to construct a DIY custom wine cellar for your home:
Step 1: Find a Suitable Location in Your House
Consider your room temperature and humidity when selecting an area. A suitable storing temperature is
essential for preserving your wine quality. Your wine can freeze if storing temperatures are too cold,
and too much heat can spoil the wine.
While the ideal wine storing temperatures are between 50 and 59 degrees Fahrenheit, you
can keep wine at
up to 69 degrees Fahrenheit.
Additionally, red and white wines might require different storage
temperatures, and you'll need to adjust the temperature depending on your wine type.
Humidity is another essential factor for storing your wine. Like temperature, too much or too little can
impact your wine quality. While 75% is often the recommended humidity for wine storage, some experts
believe humidity has little impact on wine quality.
Next, determine the size of
your cellar when picking a spot. You can install or build a cellar in areas
like your basement, closet and kitchen.
Basement cellars are often more extensive than a closet storage space. Your cooling and ventilation
systems can also determine your cellar location. You need an area where you can install adequate
cooling, heating and ventilation if you do not already have these installments.
Step 2.1: Framing Your New Construction
Studding is a vital process when constructing a wine cellar. Studs are wooden and vertical frame
components that help you frame out your wall structures. If you add a cellar to an existing room, you
can skip the studding. You'll need to install studs in a new construction to help frame your cellar
structure. Here are a few tips:
- Seal the concrete walls before installing your studs
- If you're adding thick damp proofing or a vapor barrier material to your new construction, install
the barrier before studding
- If installing closed-cell spray foam insulation, apply your studding beforehand
- You can use 2-by-4-inch or 2-by-6-inch construction for your studding
Step 2.2: Cover Obstructions and Decorate Ceilings With Soffits and Lighting
Soffits can serve two purposes - covering obstructions like piping and ducting and decorating your
ceiling. If you install your soffits to hide obstructions, follow these guidelines:
- Install IC can lighting in your soffits so they're a reasonable distance from racking, ducting and crown
molding depth
- Include the ring of the IC can light fixture when measuring the distance between the soffits and racking
and the ducting and crown molding depth
- There should be a gap between the surface of the decorative molding and the border of the light halo
(about 1 inch from the edge of the halo)
Step 3.1: Lay Air Conditioning Lines and Ductwork
Ventilation is a vital wine cellar component. You can select between tubed or ductless conditioning.
Here's a general overview of the process:
- Run ducting and lay the air conditioner lines. The ducting in the cellar often connects to the air
conditioning system in your boiler or mechanical room
- Run your lines from the air conditioning to the condenser location, which can be outdoor or indoor
- Lay the drain cable and electric wiring
Here's how to install a ductless air conditioning system:
- Run the cables from the ductless conditioning system in the mechanical or technical room to the
condenser location, outdoors or indoors
- Run drain cables and electric wiring
Step 3.2 Installing a Self-Contained Cooling Unit
Creating a wall opening is the first step when installing your cooling unit. Here's what you need to know
when making a wall opening:
- You'll need to make or drill a hole in the wall adequately sized for the unit
- You must install and run an electrical outlet near the opening to connect your unit. Depending on
the model, it can be on the inside or outside of the unit
- Your unit can require a drain line, so you'll need to find a location suitable for a condensate
drain
- Self-contained units cannot add humidity to your room, so consider installing a 110V
electrical outlet for a humidifier
Step 4.1: Select Your Damp Proofing Material
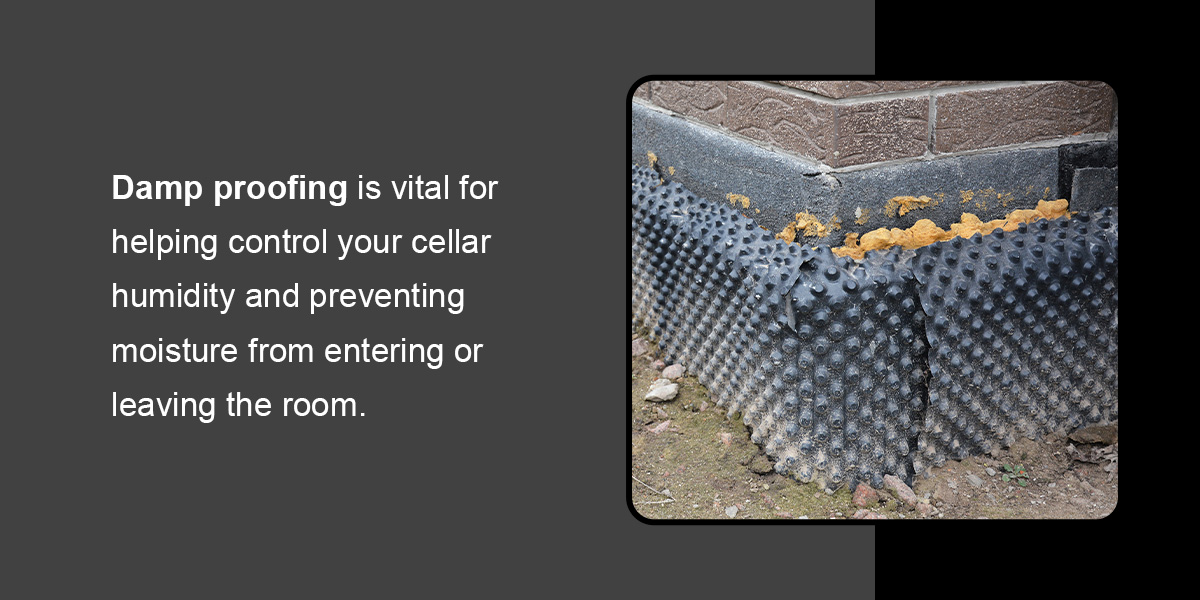
Damp proofing is vital for helping control your cellar humidity and preventing moisture from entering or
leaving the room. You can damp proof or retain your cellar moisture with a vapor barrier. A thick vapor
barrier (6 millimeters) can provide maximum wall insulation. This process is important, even if you're
converting a closet into a cellar.
Step 4.2: Select Your Insulation
Insulation like closed-cell spray foam can protect your vapor barrier and prevent holes or punctures from screwing
and drilling. Apply closed-cell spray foam to interior walls if you do not have a thick or 6-millimeter vapor
barrier. If gaps and holes appear, closed-cell spray foam can expand to fill cavities, preventing moisture
from
leaving the room. Install your insulation flush against the drywall to avoid gaps and ensure maximum
protection.
Step 4.3: Wrapping the Walls and Filling Holes
Leave an excess vapor barrier at the corners to wrap it, then:
- Overlap the seams and use tuck tape to secure them. Do not use duct tape
- Encase your ceiling beams and the floor if not on the slab
- Use closed-cell spray foam insulation on holes and wall cavities for vapor barriers installed on the warm side
of the cellar
Step 4.4: Applying Insulation and Vapor Barrier to the Wine Cellar
If this is a remodeling project, you can wrap the existing studs in the room similarly to the ceiling
joists with these guidelines:
- Ensure the vapor barrier is on the warm side of the wine cellar, meaning the exterior cellar wall
- After installing the vapor barrier, you must put insulation in the stud and wooden beam cavities
- You can use vinyl or foam-based fiberglass batts
- Applying fiberglass in a 2-by-4-foot wall cavity can provide the minimum insulation. A 2-by-6-foot
wall fiberglass will offer moderate insulation
- Fill all openings with insulation, preventing any gaps
Consider also
insulating your floor with a minimum of R13 insulation.
Step 5.1: Electrical Outlet Placement in the Wine Cellar
It's best to place outlets in a wine cellar in the dead spaces at the corners where your racks come
together when building a wine cellar. If you put the outlet outside of this area, it may be obstructed
by one of the wine rack posts. Following your local building code for outlet placement is essential,
which will supersede any recommendations for outlet placement in your cellar.
Step 5.2: Outlet Placement for High Reveals With Lighting
It is unnecessary to place an electrical outlet where a high reveal racking is located to plug in your
lighting. The cord can reach down to the outlet placed in the dead space as far as six feet away.
If you prefer to place the outlet in this area for ease of access, you must inform your design consultant
to locate the outlets accordingly when they design the outlet. We recommend that outlets for high
reveals and other accent lighting, such as archways, be placed on a switch.
Step 6.1: Covering Your Walls and Ceilings
Cover your wall after installing your insulation, damp proofing and electrical components - you can use
green board, a water-resistant drywall, to secure the walls and ceiling.
Ensure that you secure the green board flush against your walls and ceilings with screws to protect your
insulation and other components from water damage. You can seal the drill holes with fire-prevention
sealant to contain fires in case of electrical damage or other fire hazards.
Step 6.2: Finishing the Drywall
The base molding will be attached to the front of the racking, and you must run the drywall to the floor
to prevent gaps. Do not install molding on the wall to ensure the back of the rack sits flush with the
wall.
Step 6.3: Painting the Drywall
Here's how to paint your drywall:
- Start with a primer on the drywall, and then use a water-based paint for exterior components like
your door to prevent wear from moisture
- If you don't have time to let the space air out, use water instead of oil-based paint, as it can
leave a pungent smell in your cellar
- Ensure you paint the drywall to the floor to prevent gaps
Step 6.4: Alternative Wall and Ceiling Coverings
You can add edge joint material like wood to the ceiling and walls for decoration. Select a material to
complement your racking wood, stain or lacquer. Screw a 3/4th" marine grade plywood on your walls and
ceiling to attach your tongue and groove material.
Step 7.1: Installing Your Floors
Picking a wear-resistant floor for your wine cellar. The high humidity in your wine cellar can cause
moisture damage in floor types like vinyl and carpet. Over time, this floor will rot or move out of
place.
Consider moisture-resistant materials like porcelain tiles and cork. You can use hardwood flooring -
however, you'll need to let it acclimate to your cellar temperatures for two days to prevent it from
swelling. Concrete is an excellent option if you seal it correctly.
Step 7.2: Alternate Ceiling
In addition to utilizing tongue and groove paneling for your ceiling, you can install a raised panel
ceiling or soffit. While these additions do not provide any substantial difference to your insulation
value, they make a dramatic difference in the aesthetic look of your cellar. You can configure raised
panels to various room shapes like square, rectangle, octagon or circle.
Step 8: Installing a Wine Cellar Door
Select a durable door like oak, steel or fiberglass. These materials can withstand moisture damage and
last for many years. You can weatherstrip your door gaps to prevent moisture from leaving your room.
You cannot use an interior door for this application. You want to maintain an environment of 55-58
degrees and 55%-75%
humidity levels. You need a barrier between that room and the other rooms of your
home, which will be closer to 70 degrees and 20% humidity levels in most parts of the U.S.
If you use a glass door, it must be thermopane to allow for insulation properties and to ensure it does
not condense on the glass due to the temperature differential. You can also use solid wood doors if you
prefer.
Step 9: Selecting Lights

You have numerous choices when picking lights for your wine cellar. However, you will need thermally
fused can lights or IC-rated cans if you use can lighting in a wine cellar. Avoid using UV lights, as
they can impact the wine that you store for a long time.
Step 10: Get the Final Revision of Your Wine Cellar Design
When you complete the construction of your wine cellar, submit the final dimensions to your design
consultant so they can complete the design.
Wine Cellar Construction FAQs
Here are some FAQ's on constructing a wine cellar:
How Much Does It Cost to Build a Wine Cellar?
The cost of a wine cellar depends on your design vision and cellar size. Custom and larger wine cellars
can require more ventilation, labor and material and may be more costly. Costs also depend on your wine
cellar type. Passive wine cellars - those that use ambient air instead of conditioned air - can be more
expensive as they have very little insulation. However, cooled wine cellars are climate-controlled and
can save you time and money on insulation.
Can You Build a Wine Cellar on Your Own?
While you can invest in a DIY wine cellar, hiring a construction specialist can save you time and money.
Contractors have expert knowledge and use their experience to develop a suitable wine cellar for your
home. They can also offer valuable design and construction advice.
What Size Should Your Wine Cellar Be?
Your wine cellar size can depend on how many bottles of wine you want to store or drink. You may benefit
from a bigger wine cellar if you plan to keep large quantities of wine bottles at once or hope to expand
on your hobby in the future.
Can I Put a Wine Cellar Anywhere In My Home?
You can install a wine cellar
in many home locations, including your basement, living room, kitchen, dining room or below the
staircase.
Where Is the Best Place in Your Home for a Wine Cellar?
The coolest and most humid place in your home is one of the best places for a wine cellar.
What Is the Best Temperature for a Wine Cellar?
The best temperatures for storing wine are 50-59 degrees Fahrenheit and 55%-75% humidity.
What Size Should My Cooling Unit Be?
Rooms nearer to the optimal wine temperature cab require smaller cooling units and are more affordable to
build. Suppose the surrounding environment has an average yearly temperature of 85 degrees, compared to
an average temperature of 65 degrees. In that case, you would purchase a more significant cooling unit
to maintain proper conditions. A dry environment will also require more frequent humidity.
What Wall Material Should You Use for a Wine Cellar?
Your seller wall material depends on personal preference and budget. Wood materials like pine alder and
mahogany can have distinct designs and price tags. You'll also need to consider the viability of
materials - some woods are less available than others and can cost more.
Build Your Custom Wine Cellar With Wine Rack Concepts, LLC
With over 35 years of wine storage design, manufacturing and construction experience, we understand the
importance of building a wine cellar to match your home and needs.
Our team of consultants can help you design and build a wine cellar you'll love. We will create a 2D design
of the custom wine cellar and help you bring your vision to life. We provide shipping and transport of your
wine cellar components to work or home with a contractor to install the cellar.
Contact Wine Rack Concepts, LLC, to get a quote
today!